Welcome to Day 8 of the 64 Million Artist January Challenge.
Act it out – is the title dreamed up by Simon Batchelor Artistic director of the Drama geezers. That sounds like a fun troupe!
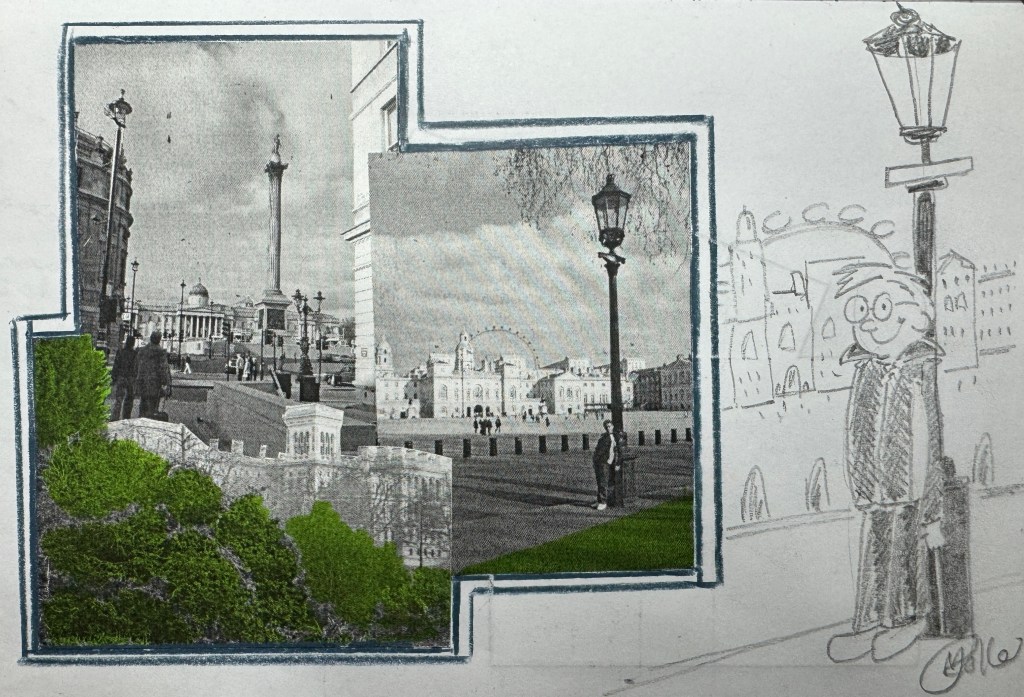
Sometimes we have ideas that we don’t have time to draw or our sketchpad are not with us. I like to use photos in these situations.
I have an example of when I went to the Mall galleries and I took pictures and stuck them together to form images. These images are usually in black and white, primarily because I don’t have a colour printer! But also because you can judge tone better in mono prints.
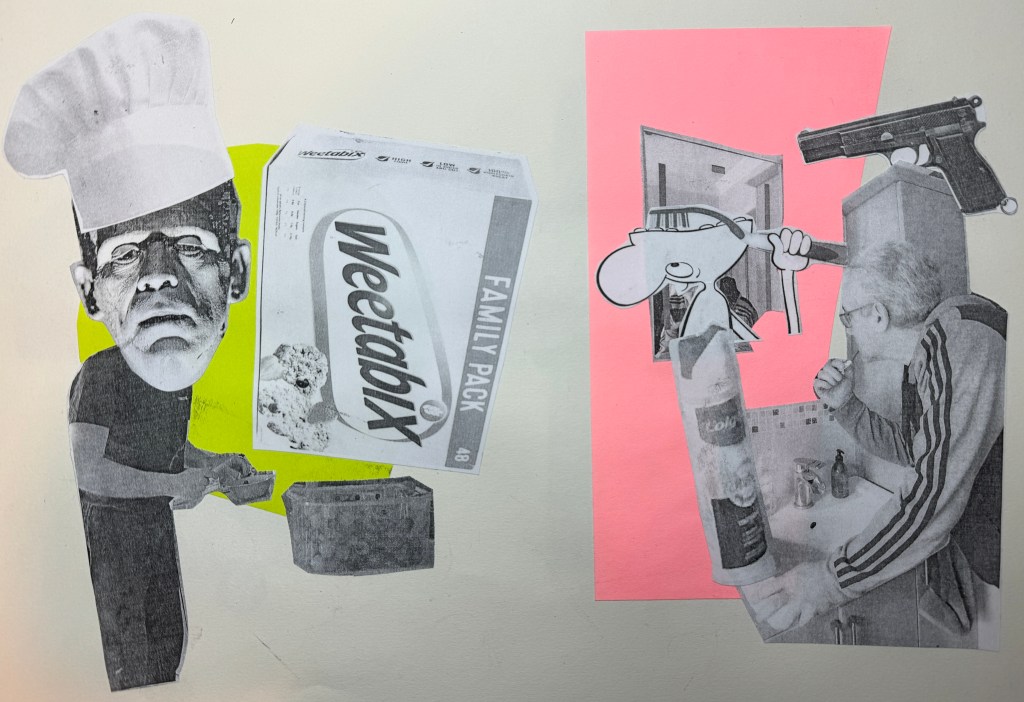
So for today’s challenge I have taken some photos of making my breakfast and brushing my teeth and I’m going to add elements to the photos to make them more fun.
These images I can use as reference to create more art in the future.
Today’s 64 Million artist challenge is an excellent opportunity for me to show you some cartooning techniques – Set by Nathan Mann the challenge is called 10 Minute storytelling.
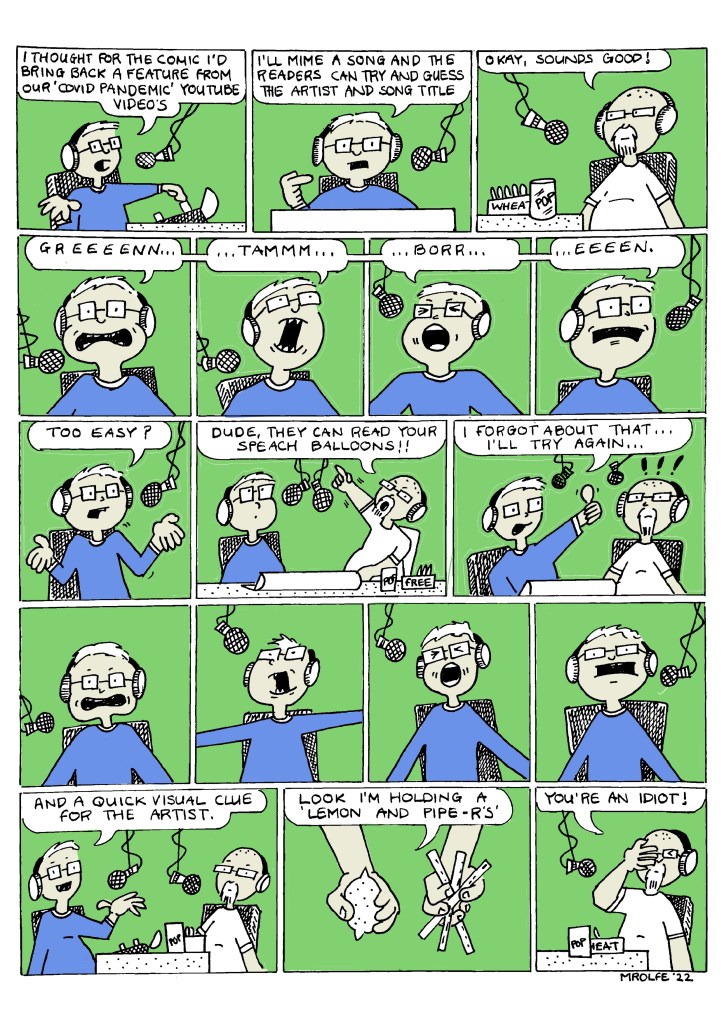
Here is an example of a cartoon that I created this year. It’s based on my hospital radio show and is part of an on-air conversation from one of my shows. The work has been created on A3 paper but the final cartoon was published at A5. The colours used were added in a digital computer programme and they are very simply applied.
So how do you start a comic strip?
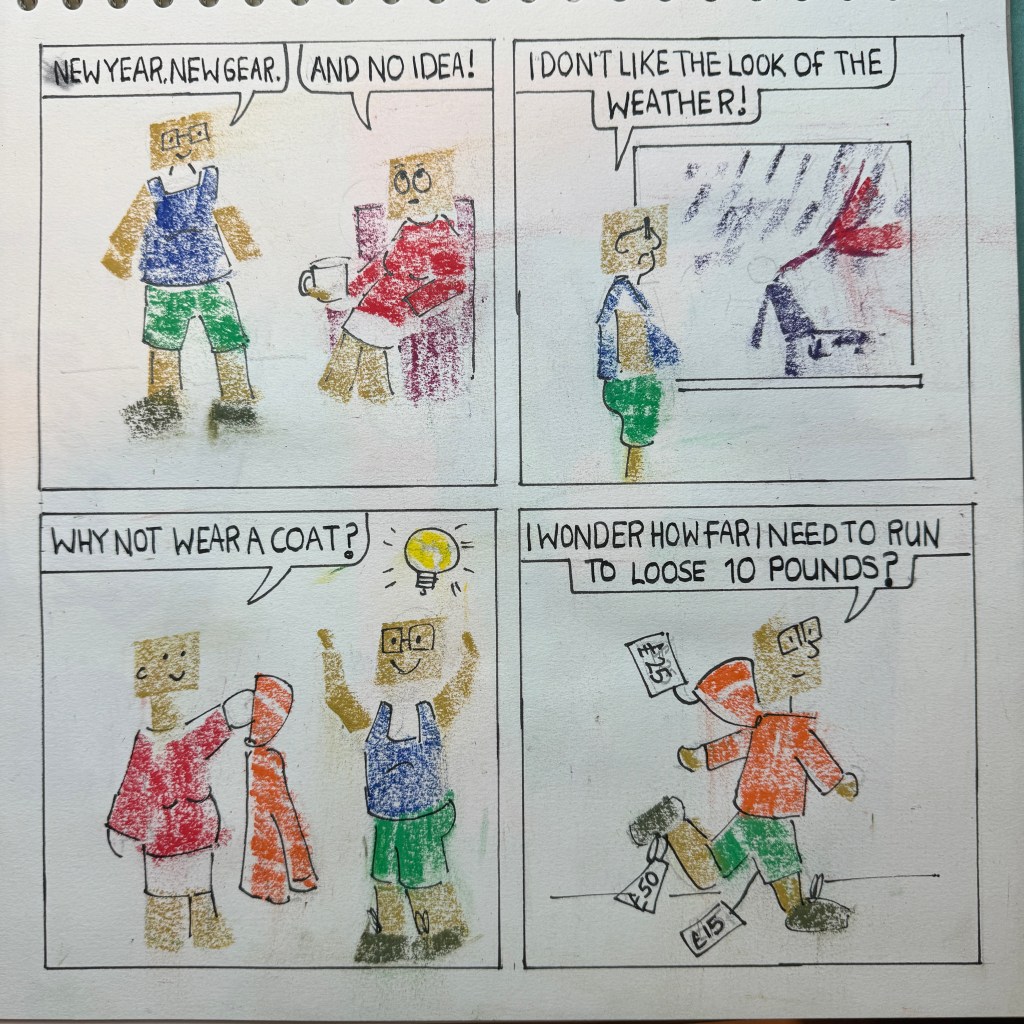
Nathan Mann has given us some great ideas to start a story by thinking about character and the space the characters live in. Nathan also uses a DOTS formula (Desire, Obstacle, tactic and success) to create his story. So I will use the same and create a four panel cartoon.
First the subject and character. The character is going to be me and produced very simply using these intense blocks.
So let’s build the story using the dots formula.
Desire is to keep fit by running Obstacle will be the weather Tactic will be a coat Success will be wearing the coat while running.
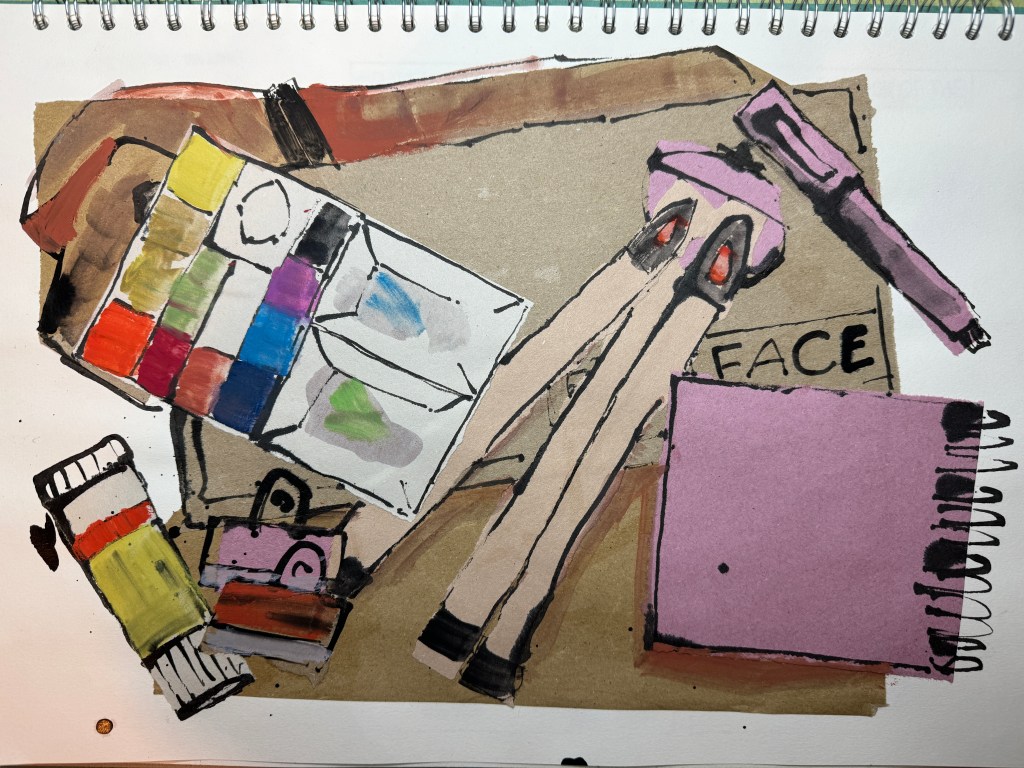
Welcome back to Day 6 of the 64 Million Artists January Challenge! Today’s challenge, crafted by participants at Eden’s Court, invites us on a purposeful journey. Join me as I reveal what goes into my bag when I embark on urban sketching!
I believe in traveling light, and my essentials include an A5 Sketchbook, 3 ink pens (including a 0.5 and a couple of grayscale brush pens), and a camera for capturing scenes and colours. If I’m sketching on holiday, I expand my toolkit with a watercolor palette, pencils, additional grayscale ink markers, a larger sketchbook, and video recording equipment.
In today’s artistic exploration, I’m taking a unique approach by using collage as my main medium. Old brown packaging paper and children’s sugar paper will be the stars of the show. I’ll layer them, draw over with ink, and finally, add interest and shadows with gouache paint.
‘Wait a minute’ is the name of the 64 Million Artist challenge today. The task involves a ruffle through my collage papers and a chance to show how I create an interesting backgrounds for your sketches.
My favourite collage papers are simple children sugar paper. It is so versatile and plays beautifully against dark ink lines. Packaging paper provides a useful mid tone, while newspapers and text inject some interest to the mix.
I create a lot of backgrounds in my sketchbooks ready for when I go urban sketching. Using watercolour, pastel or gouache you can then add highlights and darks to really make your work shine.
In todays video I will concentrate on background collage so come back for part 2 when I will show you how I use ink to create the sketch on top.
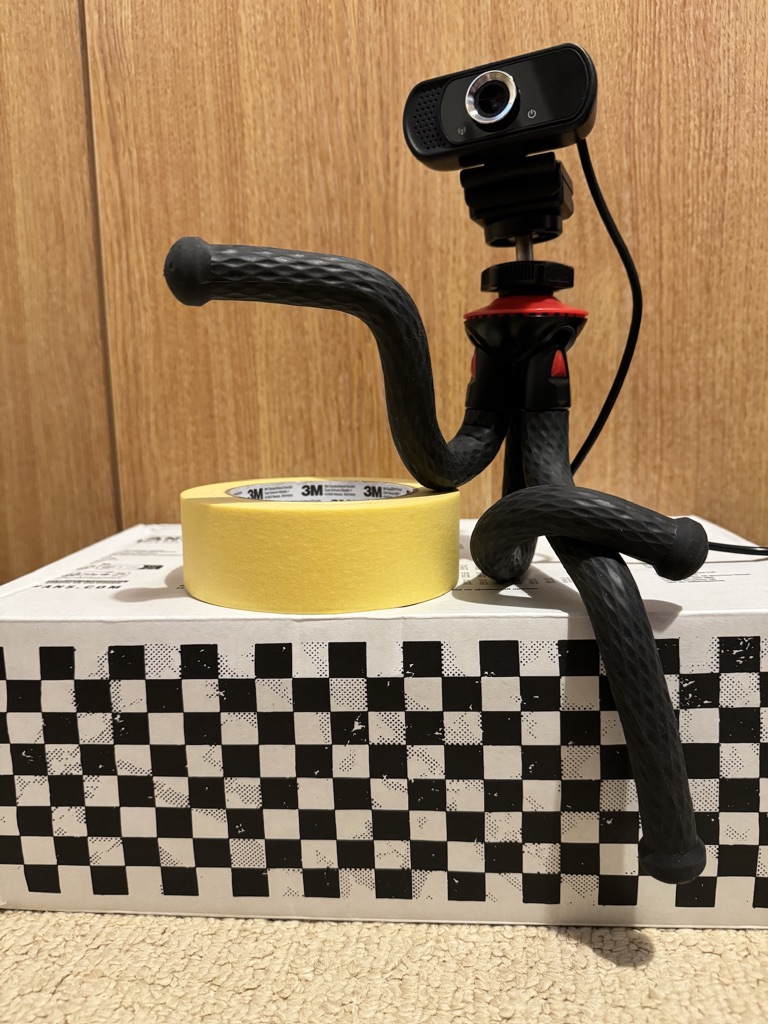
Today’s 64 Million Artists Challenge is a fascinating one, set by The Children’s Laureate of Wales, Alex Wharton. I’ve changed the prompt to allow me to develop some playful characters in my sketchbook.
Choosing the Object
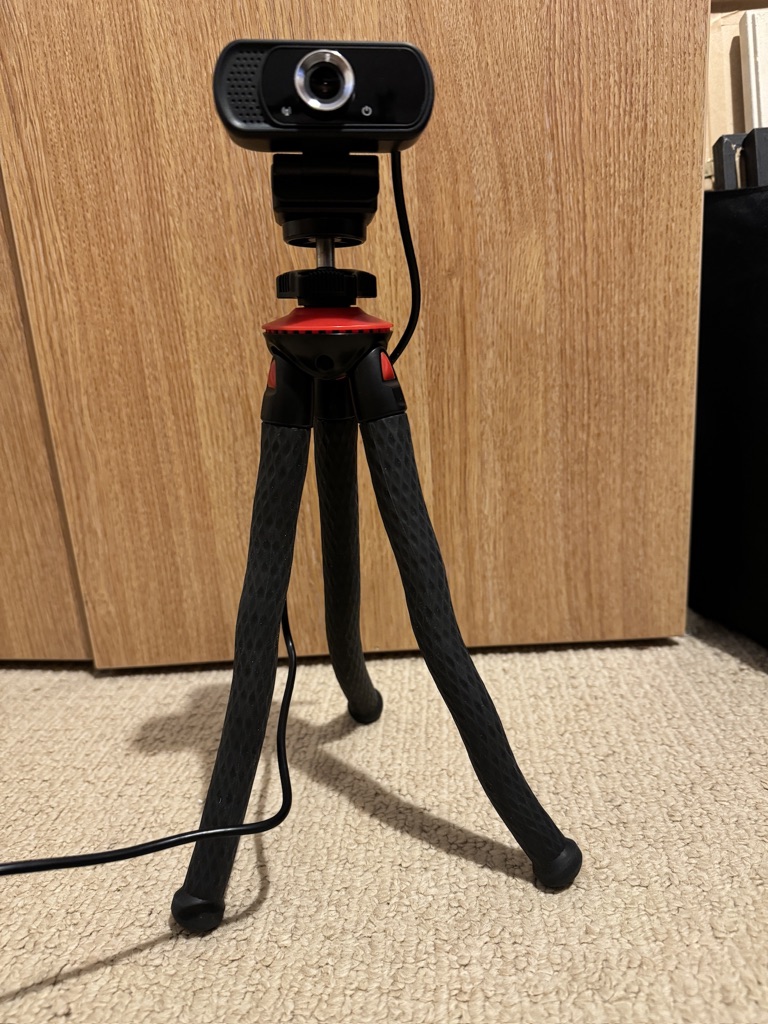
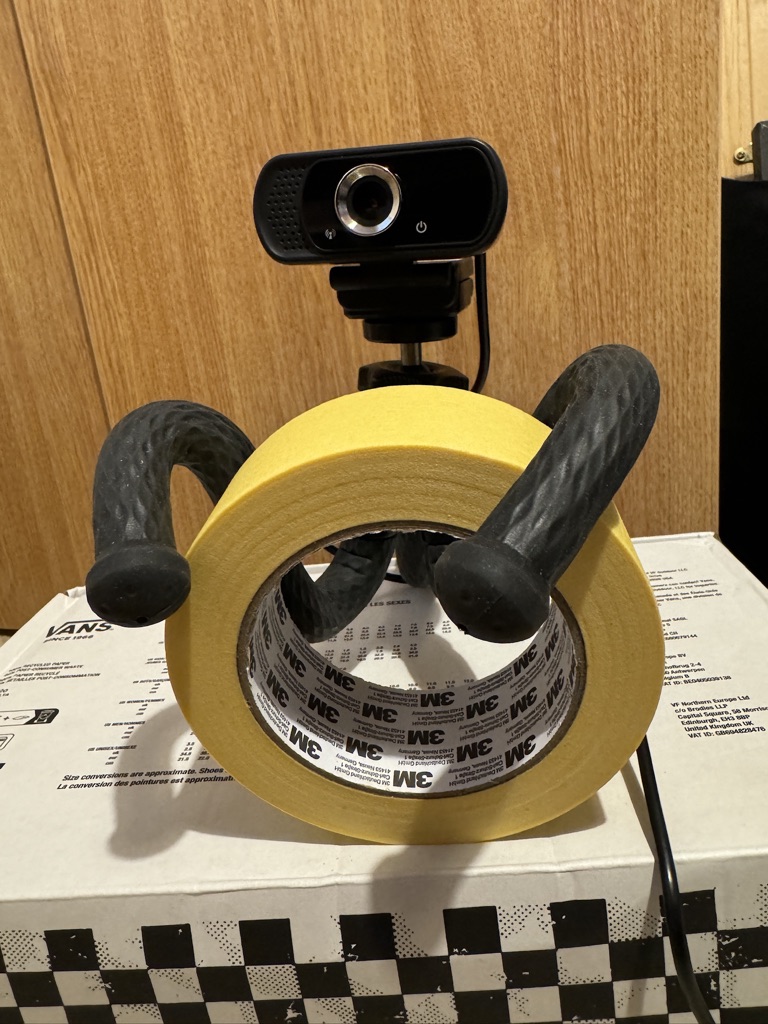
In my creative world, tripods play a vital role when I’m capturing moments or filming videos. Today, I’ve chosen a small three-legged monster of a tripod. Bent out of shape and already comical without much cartooning. Its instability and tendency to tip over, with bendable legs that refuse to stay straight, make it the perfect subject for today’s challenge.
Sketching the Character
I’ve photographed the tripod in a few poses and using a pencil I’m going to sketch out the initial form. Then I will add expressions for our tripod friend. This process is not just about drawing; it’s about bringing life and personality to an everyday object.
The Sketchbook’s Power
This challenge is an excellent example of how a sketchbook can be a playground for ideas. It’s not about perfection; it’s about experimentation and letting creativity flow. Whether you’re an experienced artist or just starting, your sketchbook can be a powerful tool for nurturing and developing artistic concepts.
Take a break from the ordinary, turn everyday objects into characters, and let your imagination run wild. Share your sketches and experiences in the comments below.
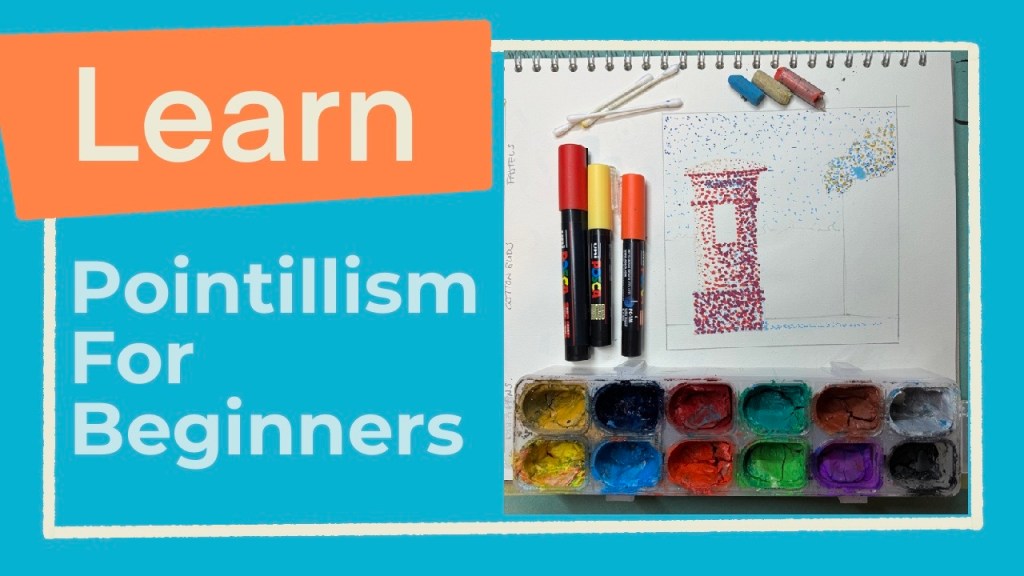
Today, we’re breaking down barriers and diving into the captivating world of pointillism. Inspired by Helen from the Frimley Health Charity and the 64 Million Artists January challenge, I want to show you that if you can paint a dot, you can conquer today’s creative challenge!
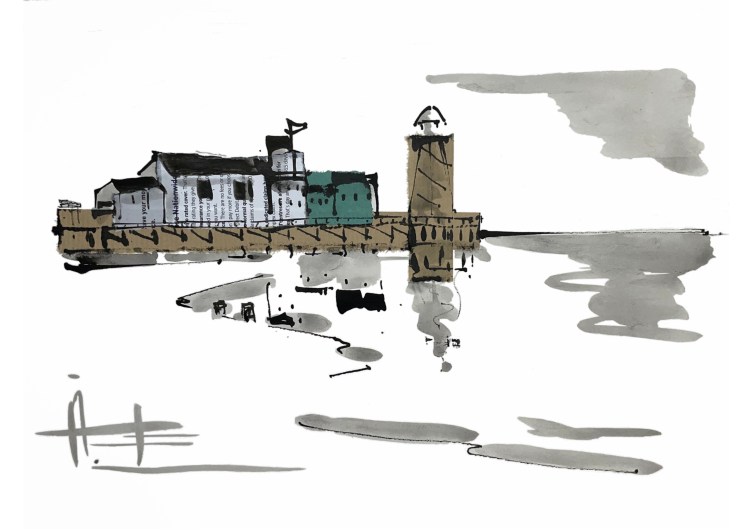
Inspiration Strikes I was unfortunate enough to require a hospital stay just before Christmas to cure a chest infection. But the 14-day stay at the Royal Brompton Hospital surrounded by the hustle and bustle of London Town, sparked the idea for today’s artistic subject – a humble letterbox.
Quick and Expressive Sketching Now, here’s the exciting part – sketching doesn’t have to eat up your entire day. Today’s challenge comes with a 10-minute time limit, perfect for those quick, expressive sketches that capture the moment. I’ll even share a time-saving tip: lightly outline your sketch with a pencil, and here’s the best part—it’s not part of the time limit!
Busting the Detail Myth You might be thinking that pointillism is too detailed, but trust me, I had the same thought. I’m by nature a quick and non-detailed artist but I fell in love with the process of creating dots, and the result is a bursting with depth and shading.
The Video Teaser: In my youtube video, I’ll walk you through the process of pointillism, a technique that may sound complex but is surprisingly simple. We’ll experiment with tools like pastels, Posca Markers, and a unique method using cotton buds (Q-Tips) and Gouache paint.
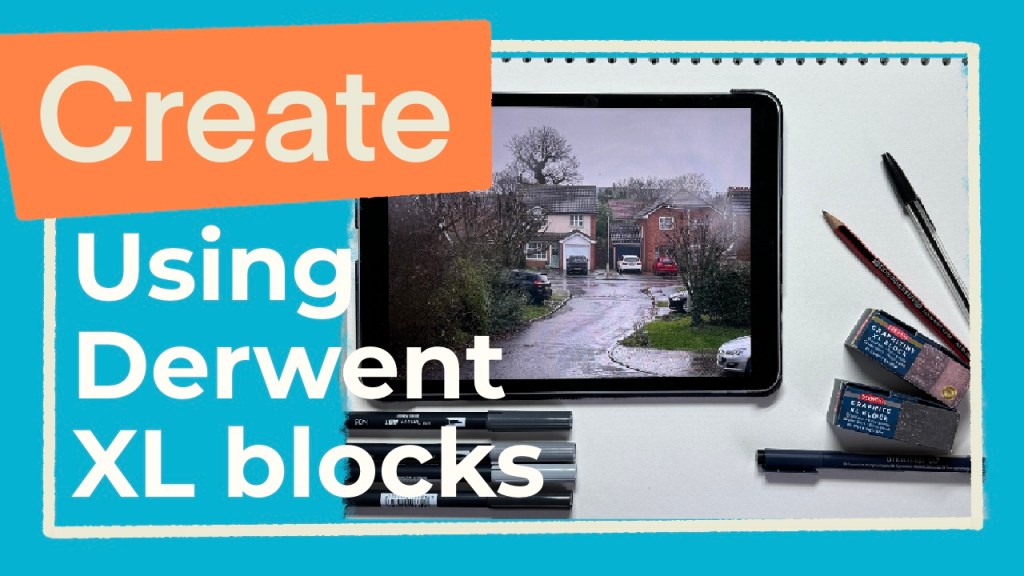
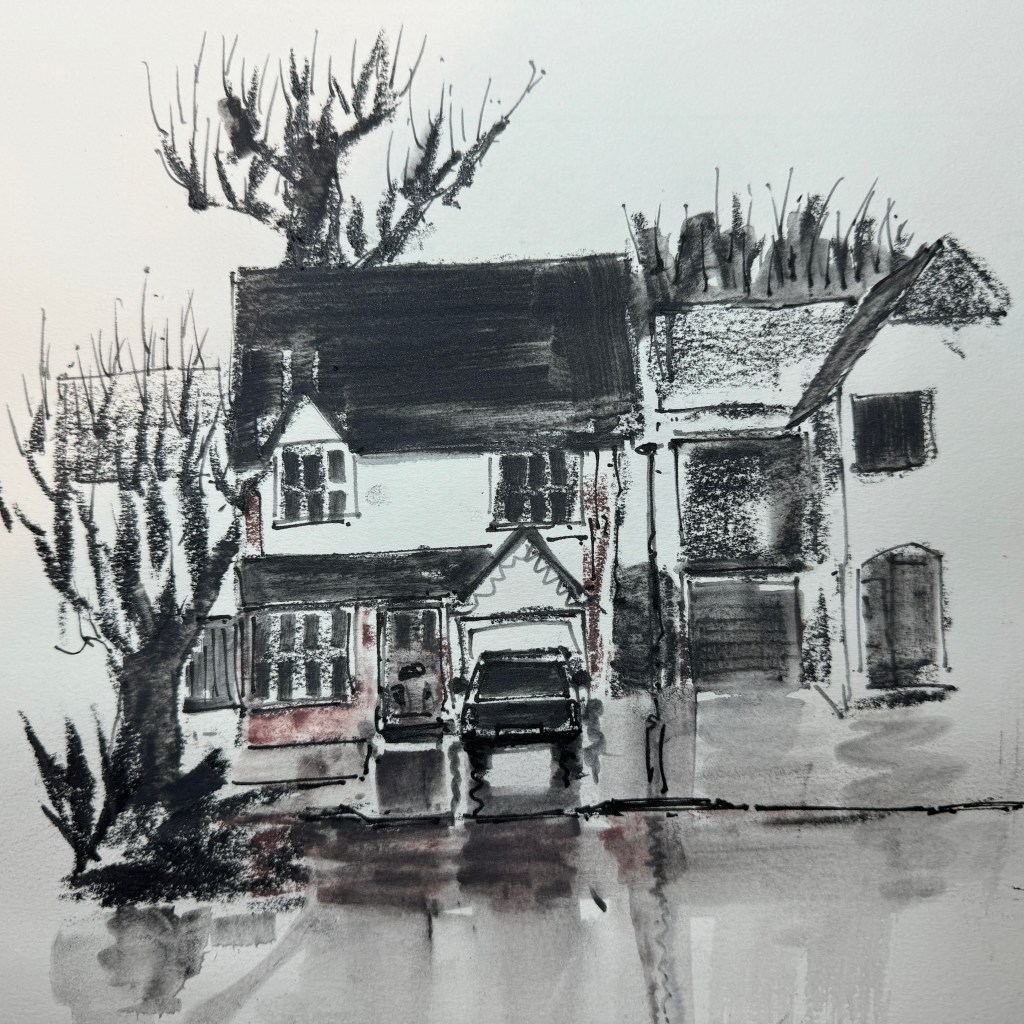
Today’s inspiration comes using the January Challenge Prompt – From My Window. I like to experiment with new materials so I’m going to be using Derwent XL Graphic Blocks to show you how easy it is to get started sketching.
The Challenge
Sally and Claire from Caerphilly Skills in Wales presented a unique art challenge – to look through a window, observe the scene, and record descriptive words that evoke its essence. The task? Transform these words into a captivating sketch, capturing the beauty that lies beyond the glass.
Experiment
I have been wanting to try Derwent’s XL Graphic blocks for sometime, I have a complete ‘mint’ collection of Derwent XL Charcoal blocks as well! How many times do we goto the art shop, buy equipment and then leave it in the back of the cupboard?
Derwent XL Blocks allow you to effortlessly build broad strokes, providing a foundation for your scene. To add finesse and detail, I’ve employed ink pens, adding detail to these mini sketchbook masterpiece! I’ve used a wet brush to drag down the graphite and create wetness to the image.
There is probably more I could do to this sketch but for now I’m happy to leave it in a rough state and come back at a later date and think about and improve on the ideas. This is what a sketchbook is for afterall!
This is the Youtube video that explains the whole process. If you have any questions please drop me a line.
Welcome, fellow creatives, to the vibrant canvas of 2024! As an artist, the dawn of a new year is my cue to reflect on creativity and explore ways to enhance my artistic practice. This year, my go-to source for inspiration is the 64 Million Artists January challenge—a treasure trove of prompts that never fails to ignite my creative spark.
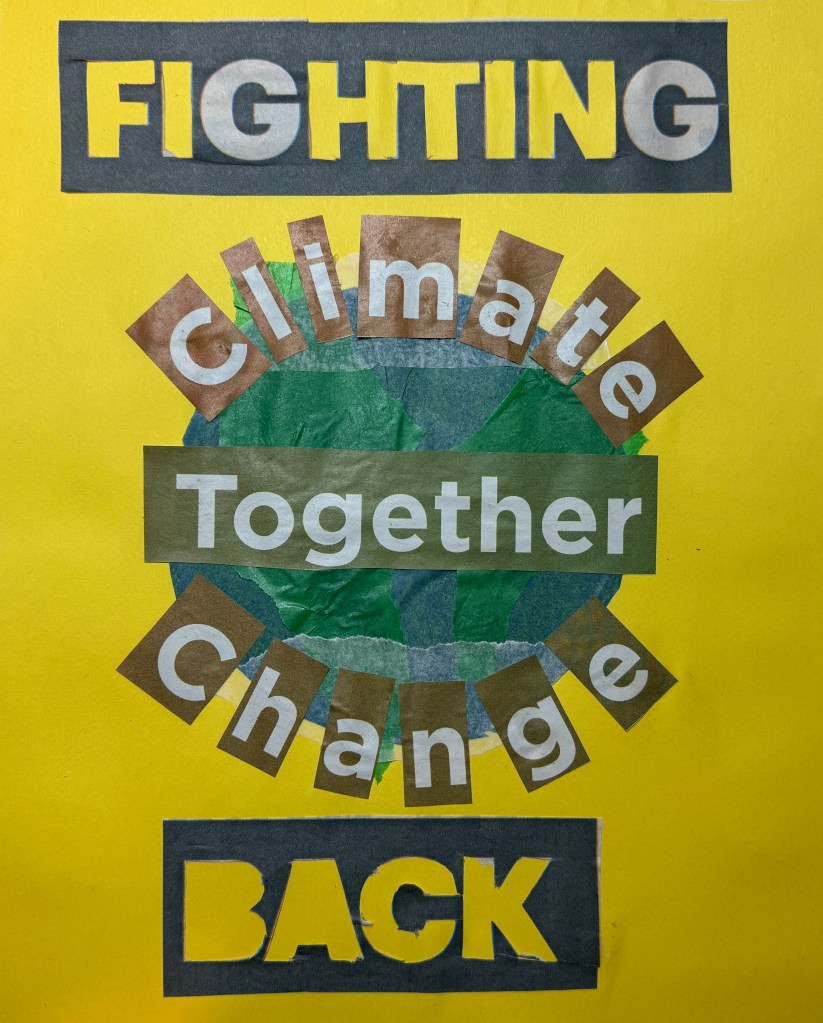
The Power of Prompts For me, these prompts aren’t just a list, they’re a pathway to regular sketching and the formation of a valuable sketchbook habit. Each prompt presents a unique challenge, a puzzle waiting to be unravelled. Take today’s prompt, for instance: “Poster for a Better Future.” It had me scratching my head for a while, resulting in a piece that, let’s say, might be mistaken for the work of a junior school artist!
Embracing Imperfections But here’s the beauty of it—I’m not fazed by the imperfection. The essence of a sketchbook is to learn from every stroke, to embrace mistakes as stepping stones to improvement. My creation may not be a masterpiece, but the prompt achieved its goal—it got me back into a daily habit of drawing and thinking creatively.
Learning from the Journey The sketchbook is my sanctuary of self-discovery. Flipping through its pages allows me to witness my journey, learn from mistakes, and find inspiration in unexpected places. The satisfaction lies not just in the final piece but in the growth and evolution that each page represents.
Motivation in Reflection Looking back at past artworks isn’t an exercise in self-critique; it’s a powerful motivator. It’s a reminder of progress, a testament to the journey taken. My simple exercise for today involved sifting through collage scraps, arranging headlines on paper, and editing until the image met the prompt’s brief.
Join the Journey Curious about the process? You can witness my creative endeavor on YouTube! Let’s embark on this artistic journey together, using the prompts from the 64 Million Artists January Challenge to cultivate a sketchbook habit that will fuel our creativity throughout the year. Are you ready to embrace imperfections, learn from your artistic journey, and build a sketchbook filled with inspiration? Let’s make 2024 a canvas of boundless creativity!
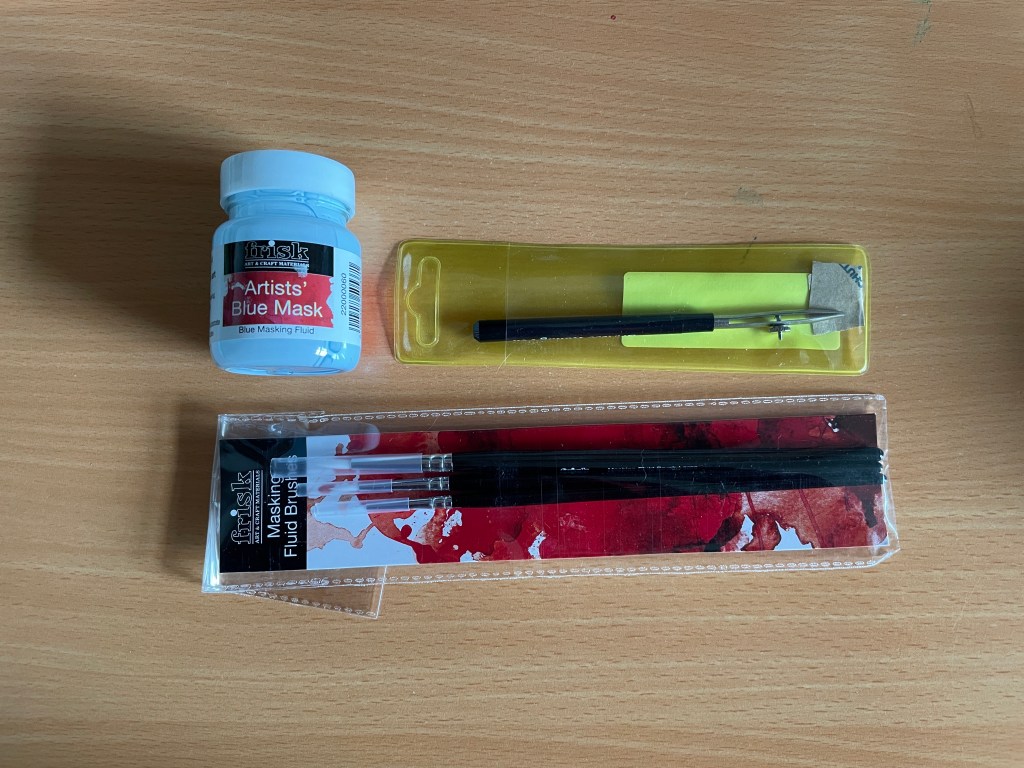
I’m not a fan of masking fluid in watercolour paintings, but I see people use it to create some fantastic art. I decided to change my attitude by attending a workshop specifically using the dreaded liquid latex.
Before I start, these are my issues with masking fluid.
Applying masking fluid ruins my brushes.
Getting masking fluid off a painting hurts my fingers.
The stark white paper that it leaves behind looks out of place with the rest of the image.
Cathy Read was the tutor of the workshop. Cathy appeared on Landscape artist of the Year and in her own words – ‘I’m here to champion masking fluid and change the worlds attitude to masking fluid, one artist at a time.’ A perfect teacher for a cynical masking fluid hating artist, like me.
Applying masking fluid ruins my brushes
While I have been struggling applying masking fluid with old brushes, using soap to stop it sticking to the bristles, trying to get clean lines, and embracing splodges. Cathy has been using an old school ruling pen – achieving marvellous lines and beautifully masked areas.
Using a ruling pen is easy. Tip some masking fluid into an old bottle top and dip your ruling pen into the liquid and apply. Beware to clean the edges with your finger or the liquid builds up on the outer edges of ruling pen and creates larger than intended lines.
Cathy’s Method
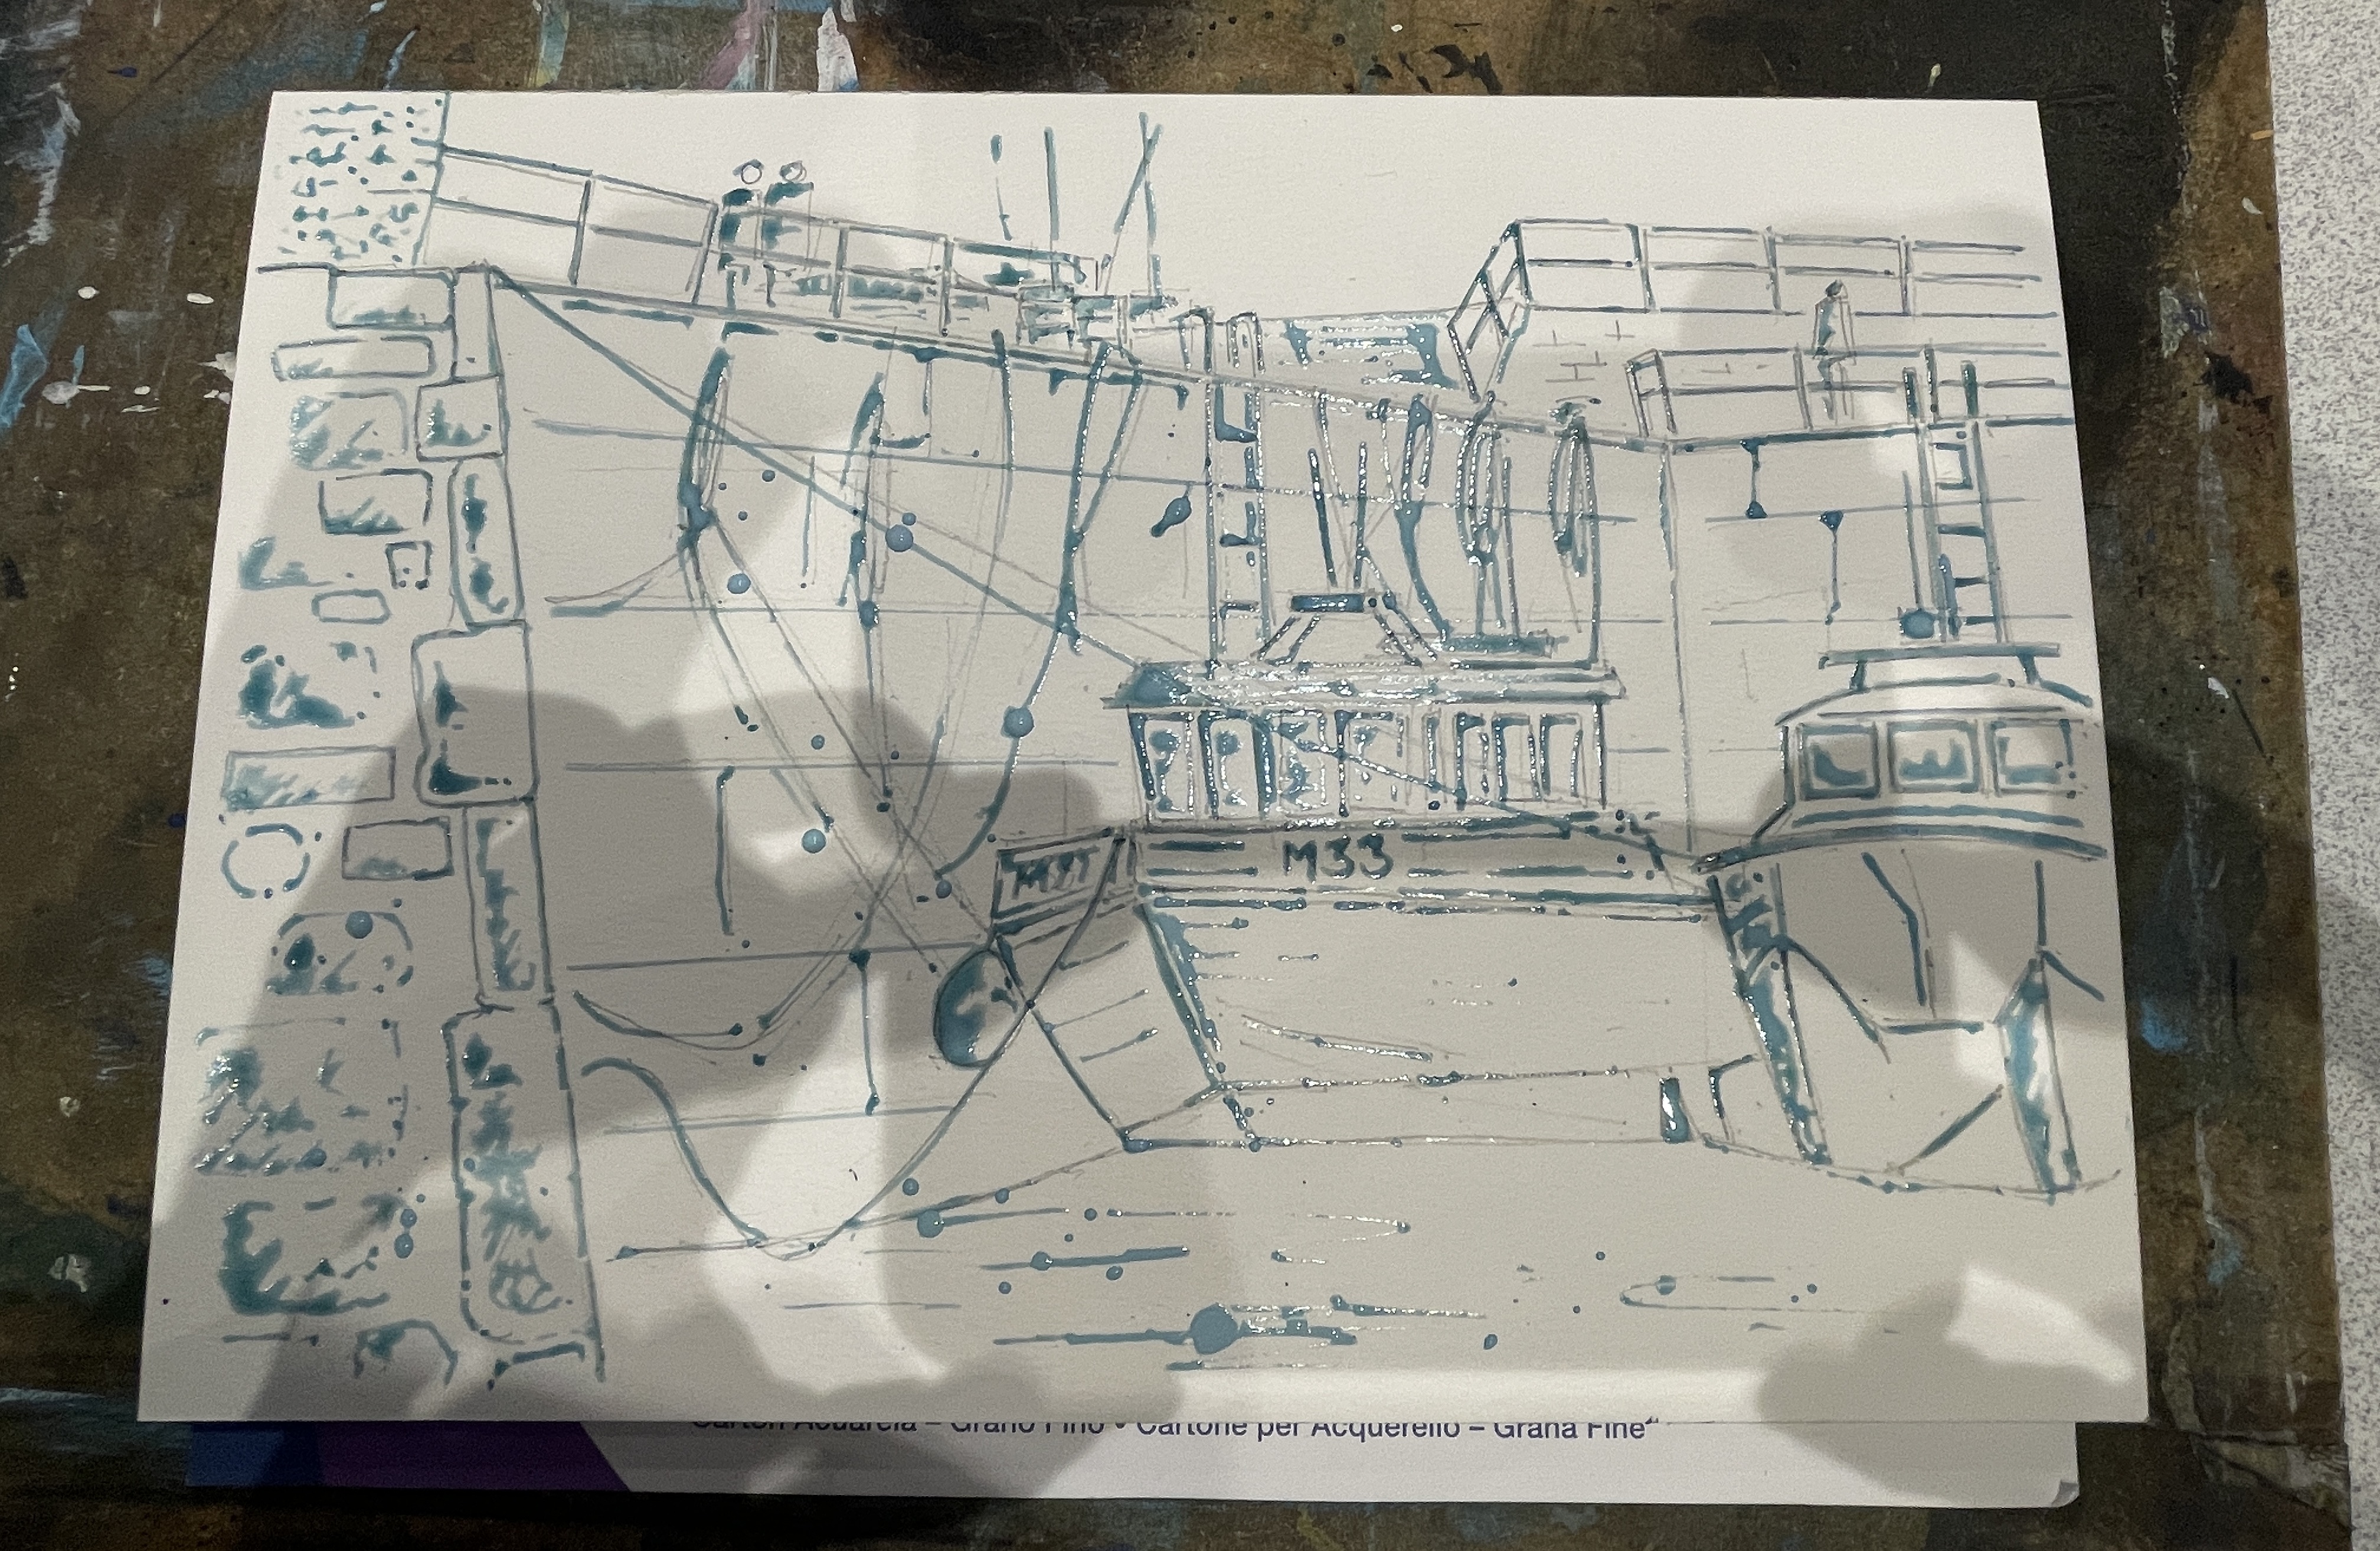
Using stretched watercolour paper Cathy had drawn out her image and added masking fluid to the line work of her image. With a sponge Cathy then wet the entire piece of paper and applied a generous watercolour wash over the whole picture. Cathy then added cling film and scrunched it up to create textural areas across the page. This was then left to dry for about 10 minutes.
The magic of Cathy’s image is in the use of ink. This is applied with the pipette of the ink bottle and controlled with salt and water spray. If the ink is running out of control, Cathy adds salt and if the ink is not flowing then she mists the paper with a water spray.
Getting masking fluid off a painting hurts my fingers
And so, we all set about creating our images. Applying masking fluid to our pencil lines, washing the sheet of paper with watercolour, and adding ink to the image. I have to admit that I enjoyed adding masking fluid to my image. The ruling pen was satisfying to use. I didn’t wipe the excess fluid off the pen but this didn’t seem to affect the lines I was making.
I added copious amounts of ink. Building up areas of darkness around the masked areas, in the hope that when I rubbed the masking fluid away, I would end up with gorgeous lines on my painting.
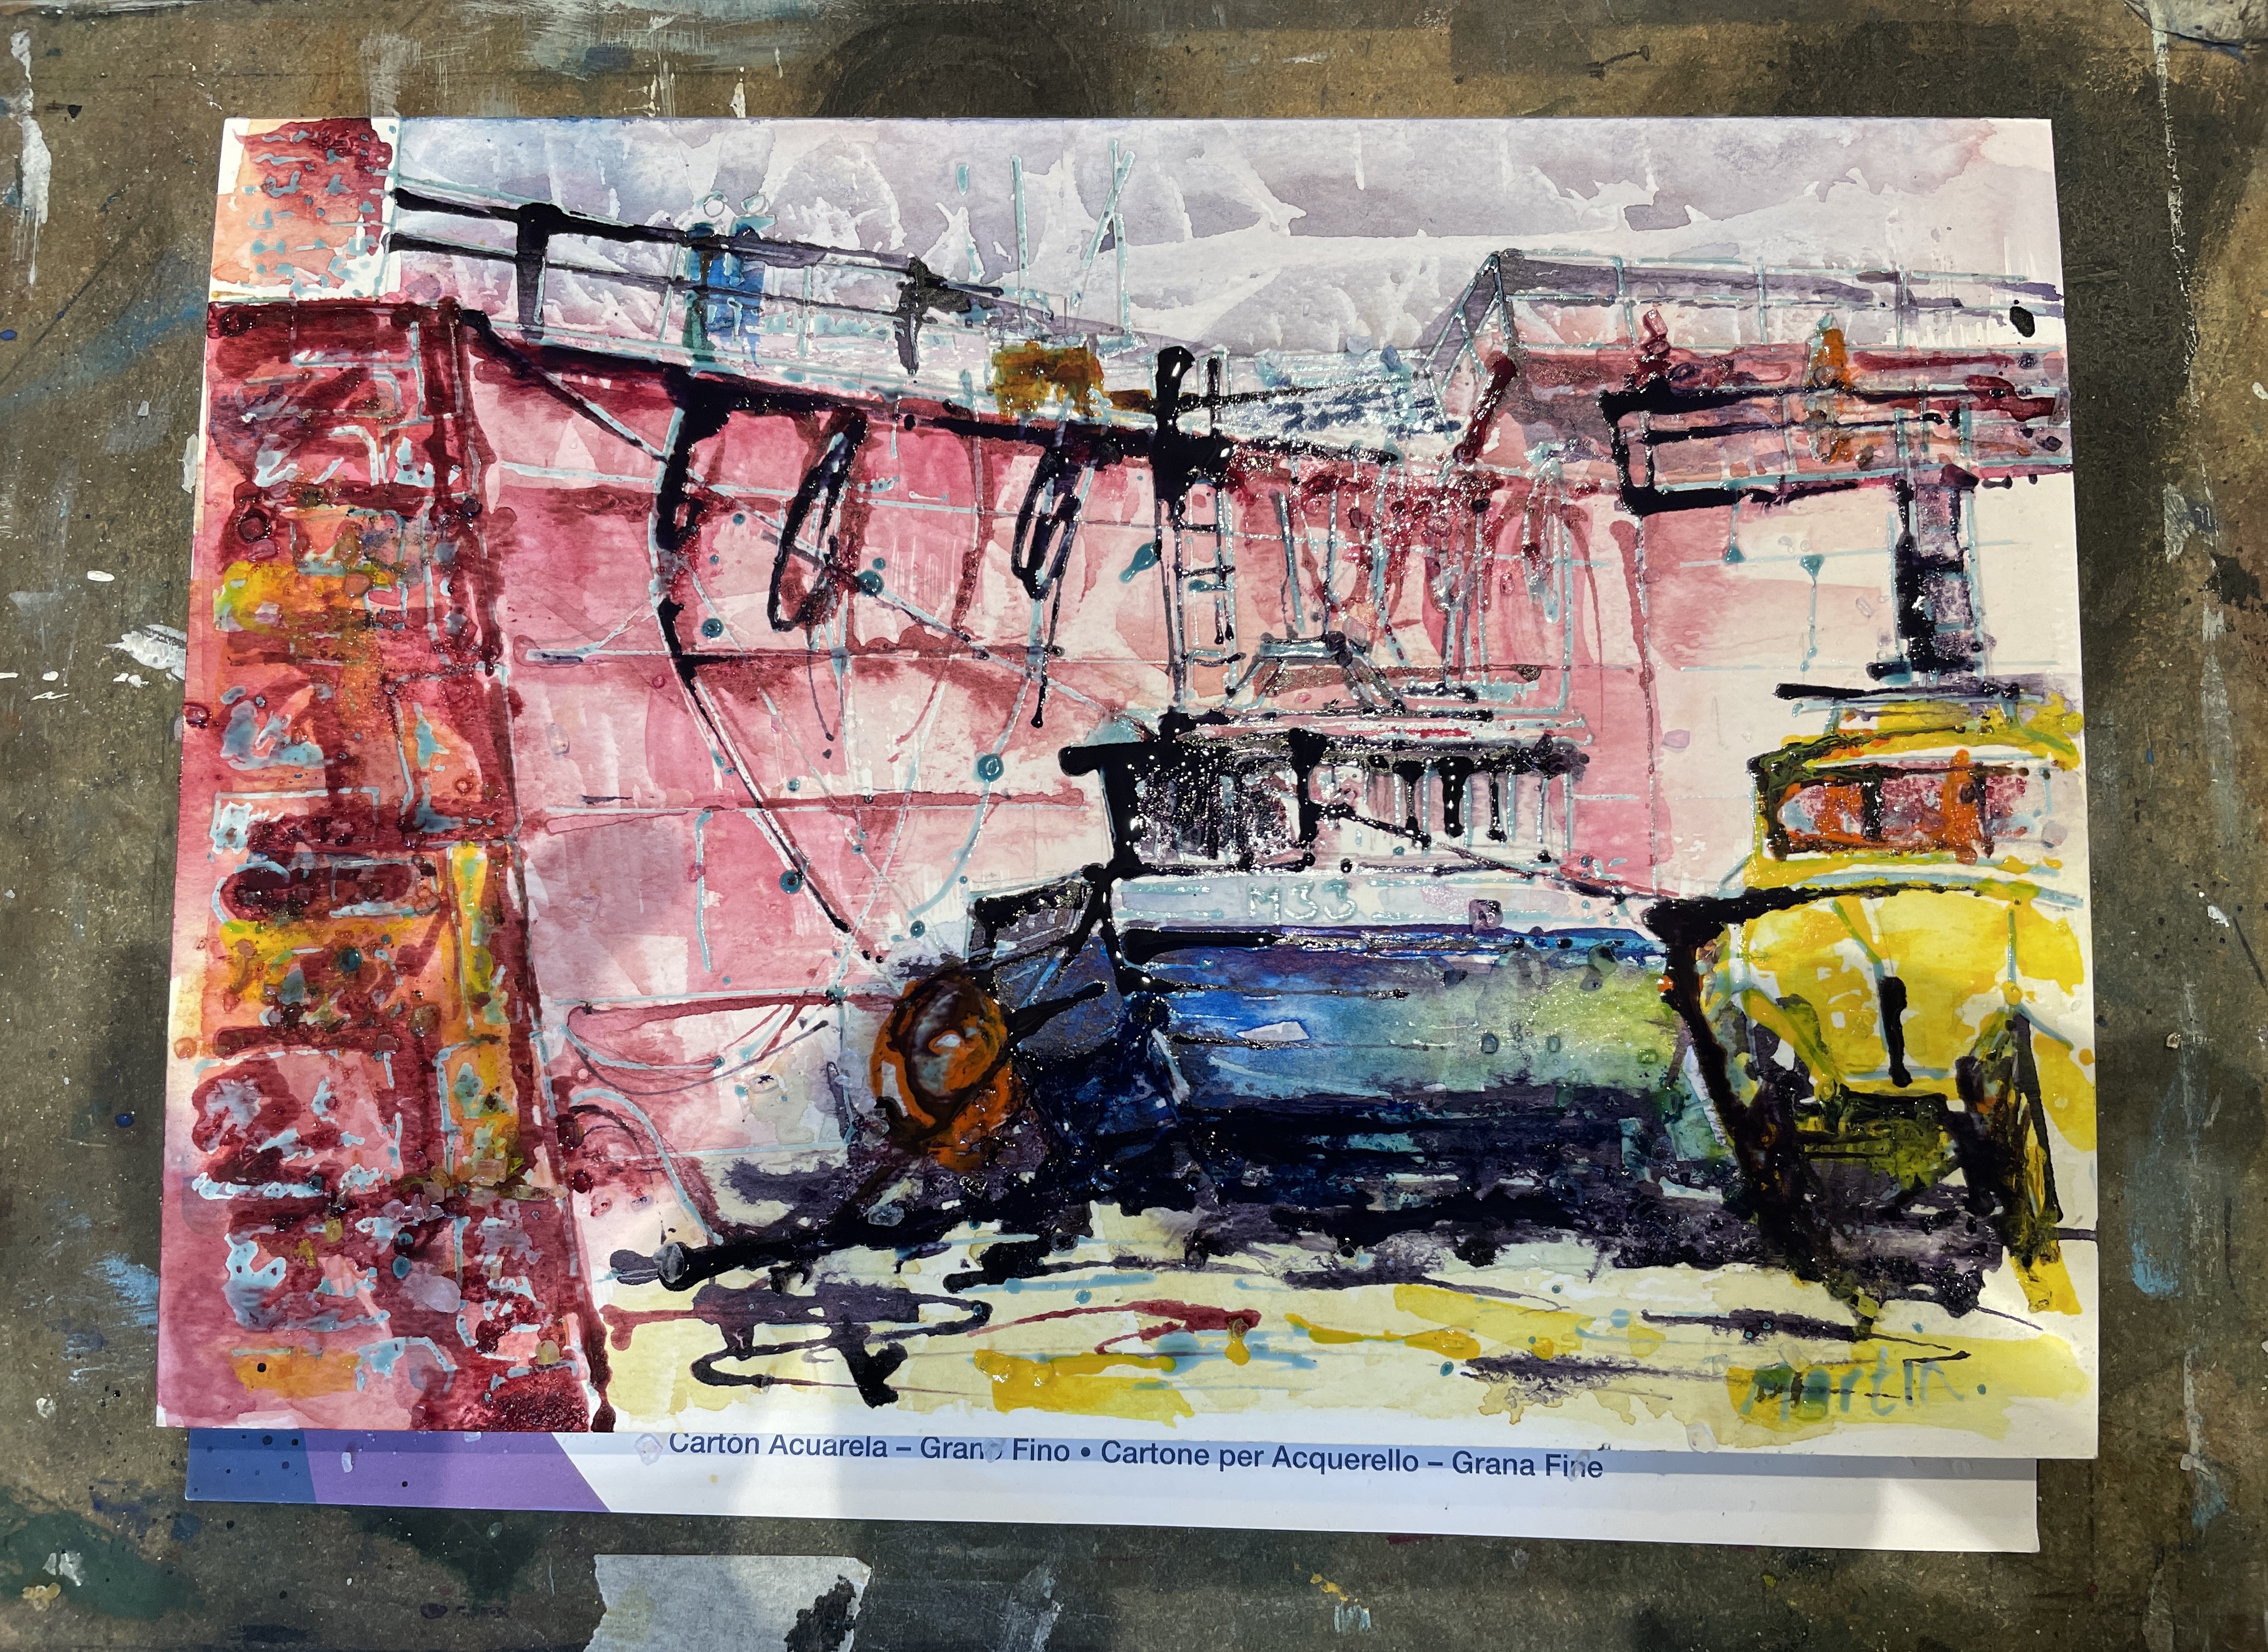
It took ages for the ink to dry. I’m not a patient person and yes, I did remove some of the masking fluid before the ink was dry. I used my finger. Cathy uses the left over masking fluid, left to dry in her masking fluid palette as a rubber to gently tease the masking fluid away. I tore a bit of my painting.
Start and finish points
Stark white paper
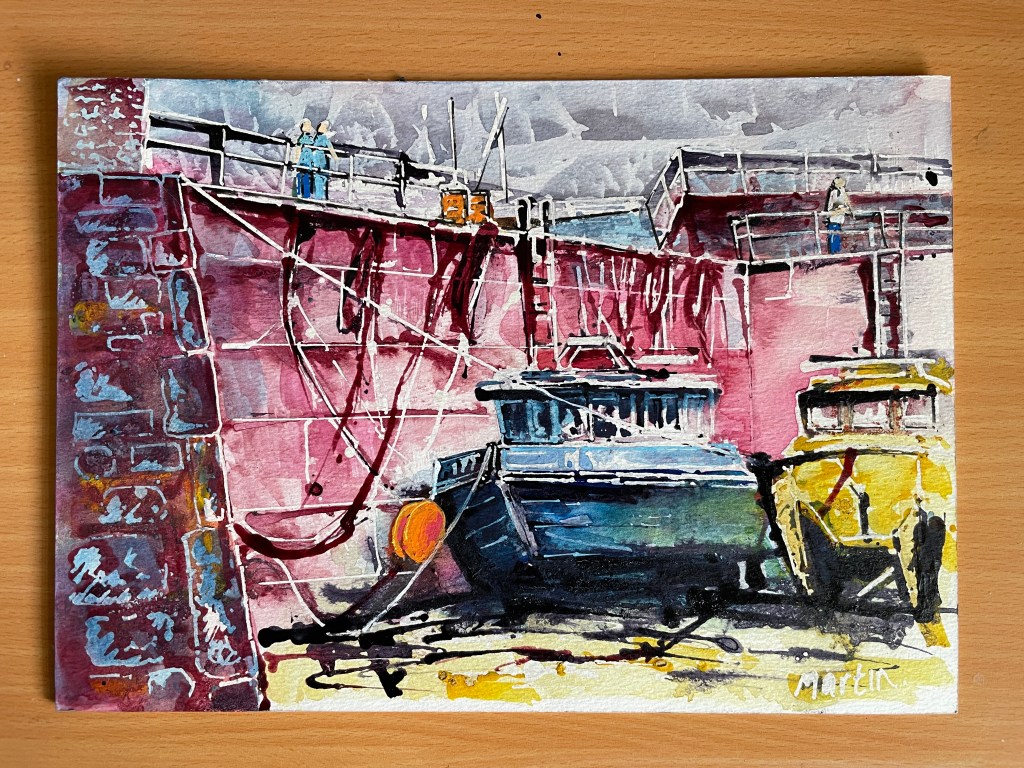
I removed the masking fluid, and I was left with stark white paper. As promised by Cathy the image had lightened significantly. I decided to leave the image overnight so I could review it with fresh eyes.
When the morning came I made some additions to the image as I wanted the blue boat to be the focal point of the picture and when I removed the masking fluid the emphasis on the boat had gone.
My takeaways – or ‘What I wish I’d know about masking fluid’
Use fresh masking fluid – Cathy recommends Windsor and Newton
Avoid blue masking fluid it may tint your paper ruining the masked areas
Tilt the paper to the light to see the masking fluid as you add it
Use a ruler on its edge to create straight lines
Get a new bottle of masking fluid as soon as it starts to go gloopy
Do not use heat on your painting (hair dryer) as this will cook the masking fluid
Conclusion
Will I be using masking fluid again? I can see the advantages of using masking fluid. And I like using a ruling pen. The effect is interesting, but I still find the stark white paper a distraction from my painting style. So, I will be using making fluid but more sparingly and not across the whole image!